👻 Psst Use code SPOOKY2026 at checkout for 30% off on the Lambda Store up until
When working with the 3D Models in Blender, we recommend using the .FBX files, as these include not only the Paint-By-Number slots for each weapon, but also sticker slots so that you can see how your finish looks with stickers.
Once you've imported the FBX into Blender, it will look something like this:
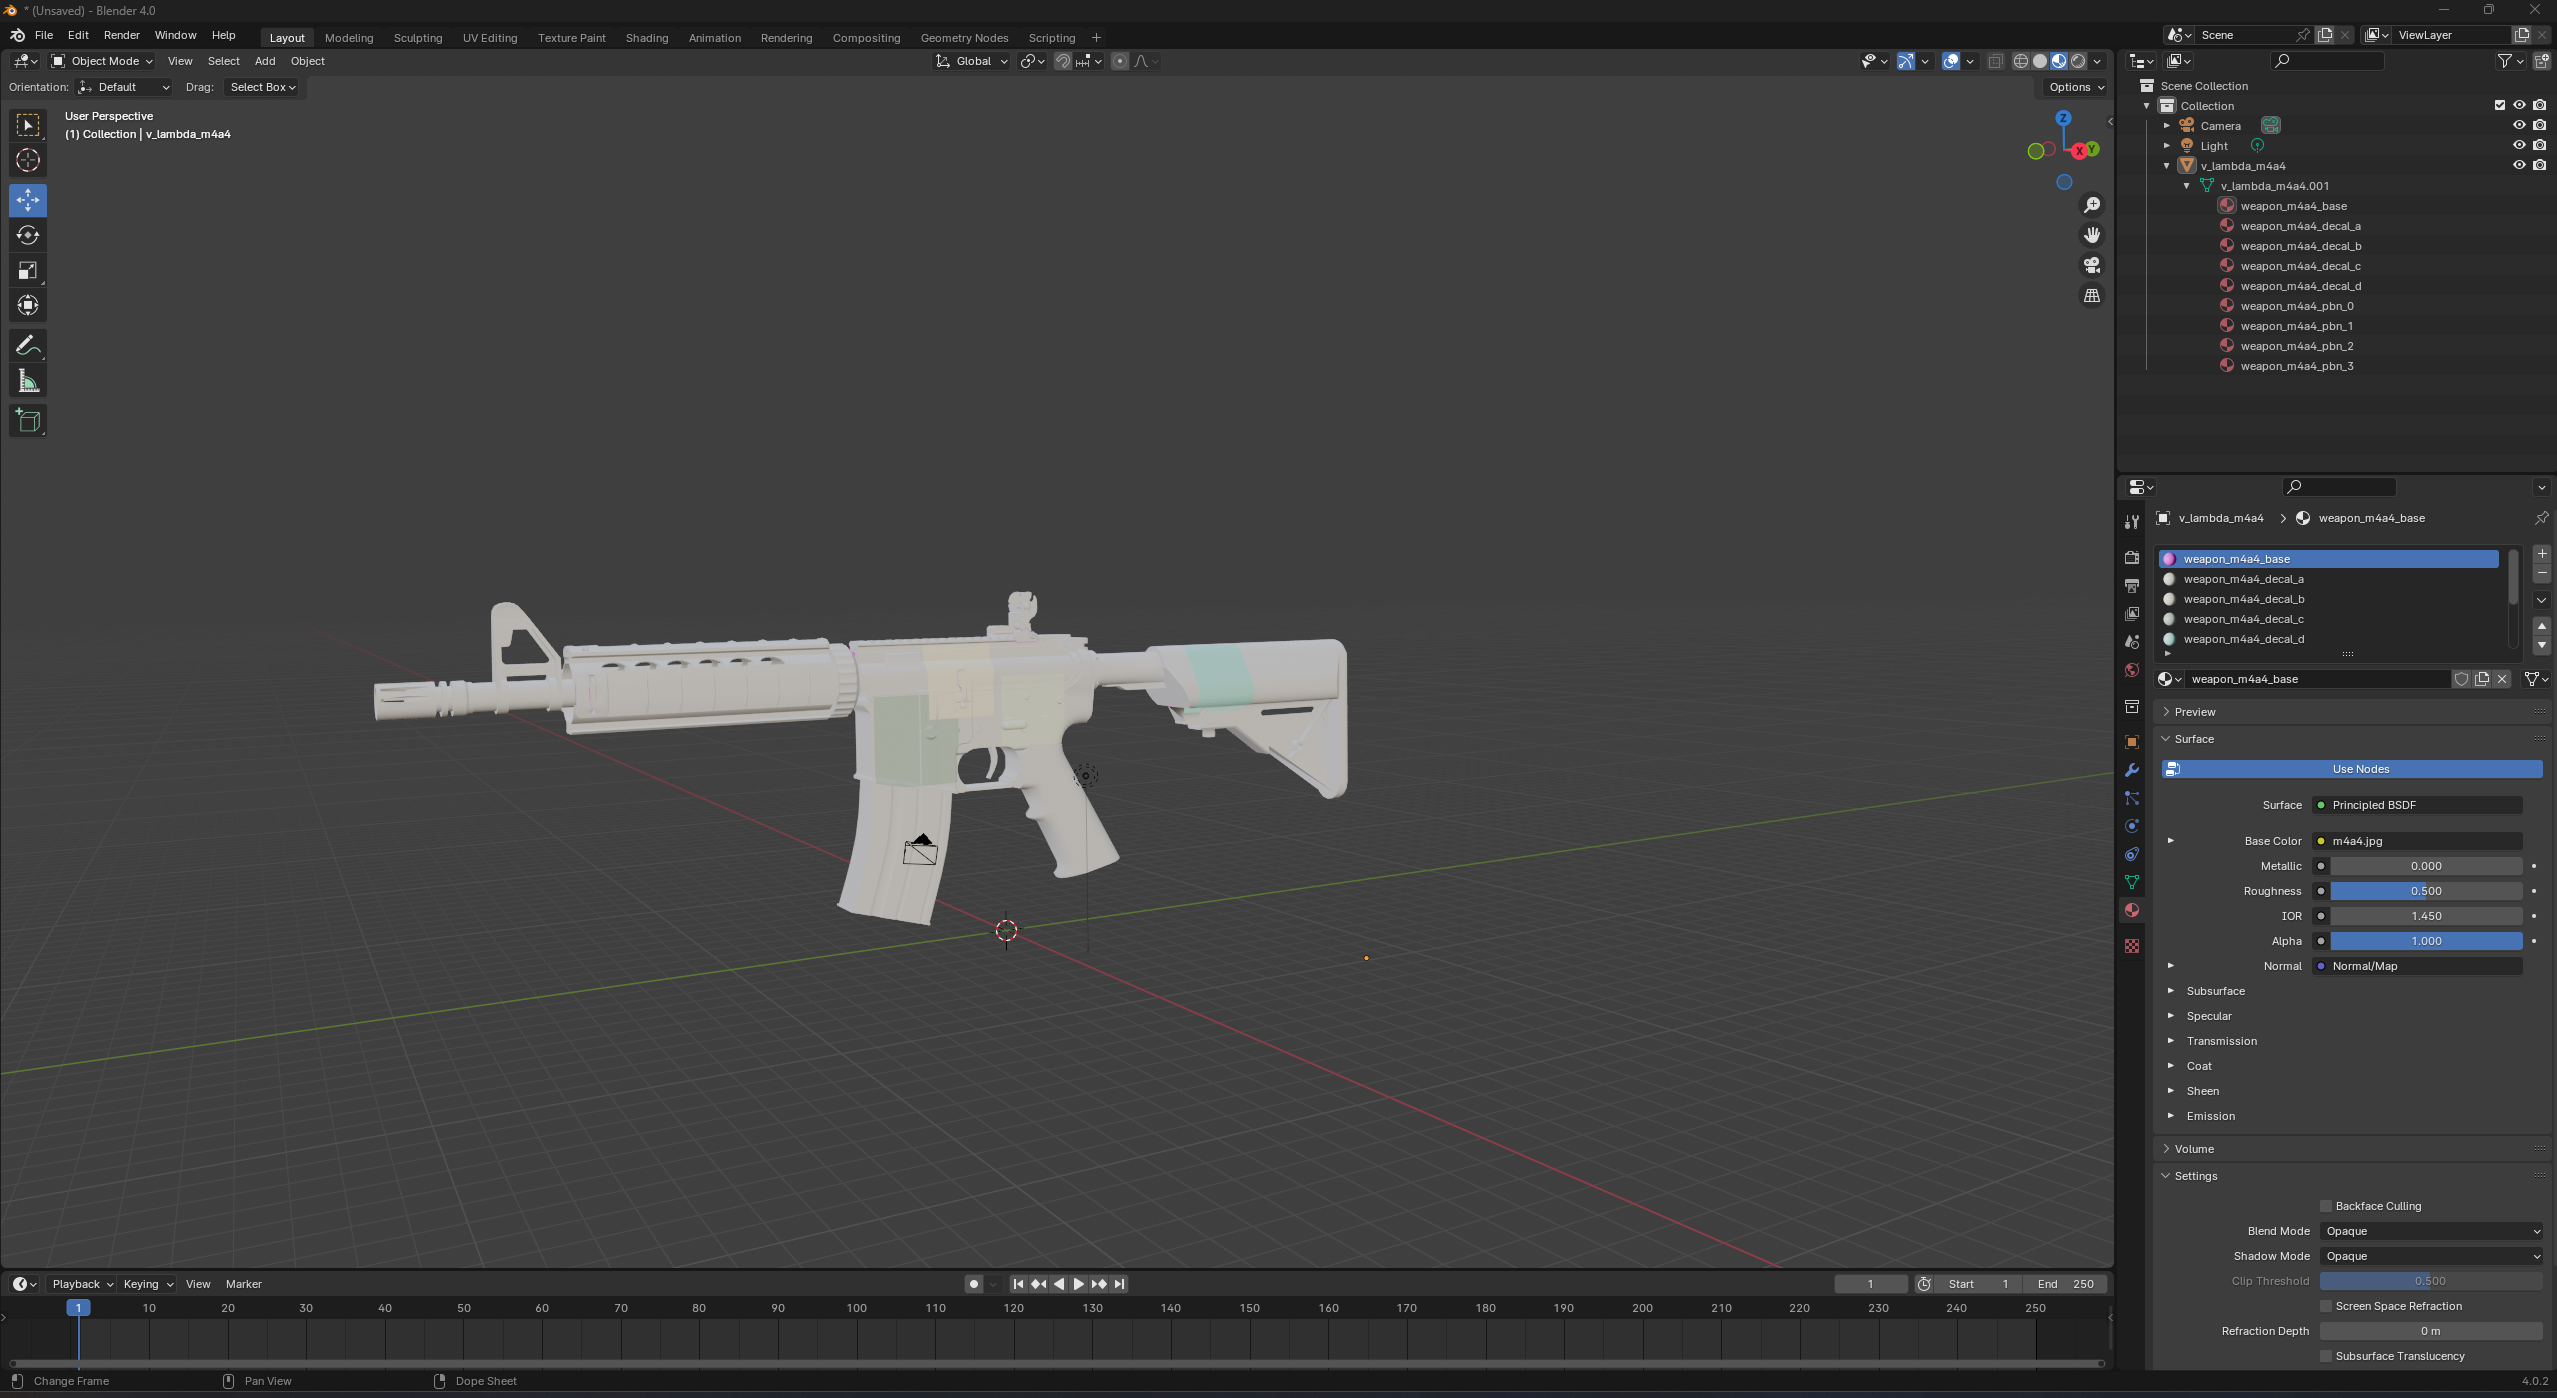
Some weapons have more material slots than others. Most have up to four paintable sections; some, like the AUG and P90, only have two.
Materials that are used for painting the weapon end in pbn_x.
In addition, there is also a base material. This should be set to the default weapon material or your custom skin. The base material slot cannot be used for pattern based finishes.
In the example above, we have four separate material slots for the M4A4.
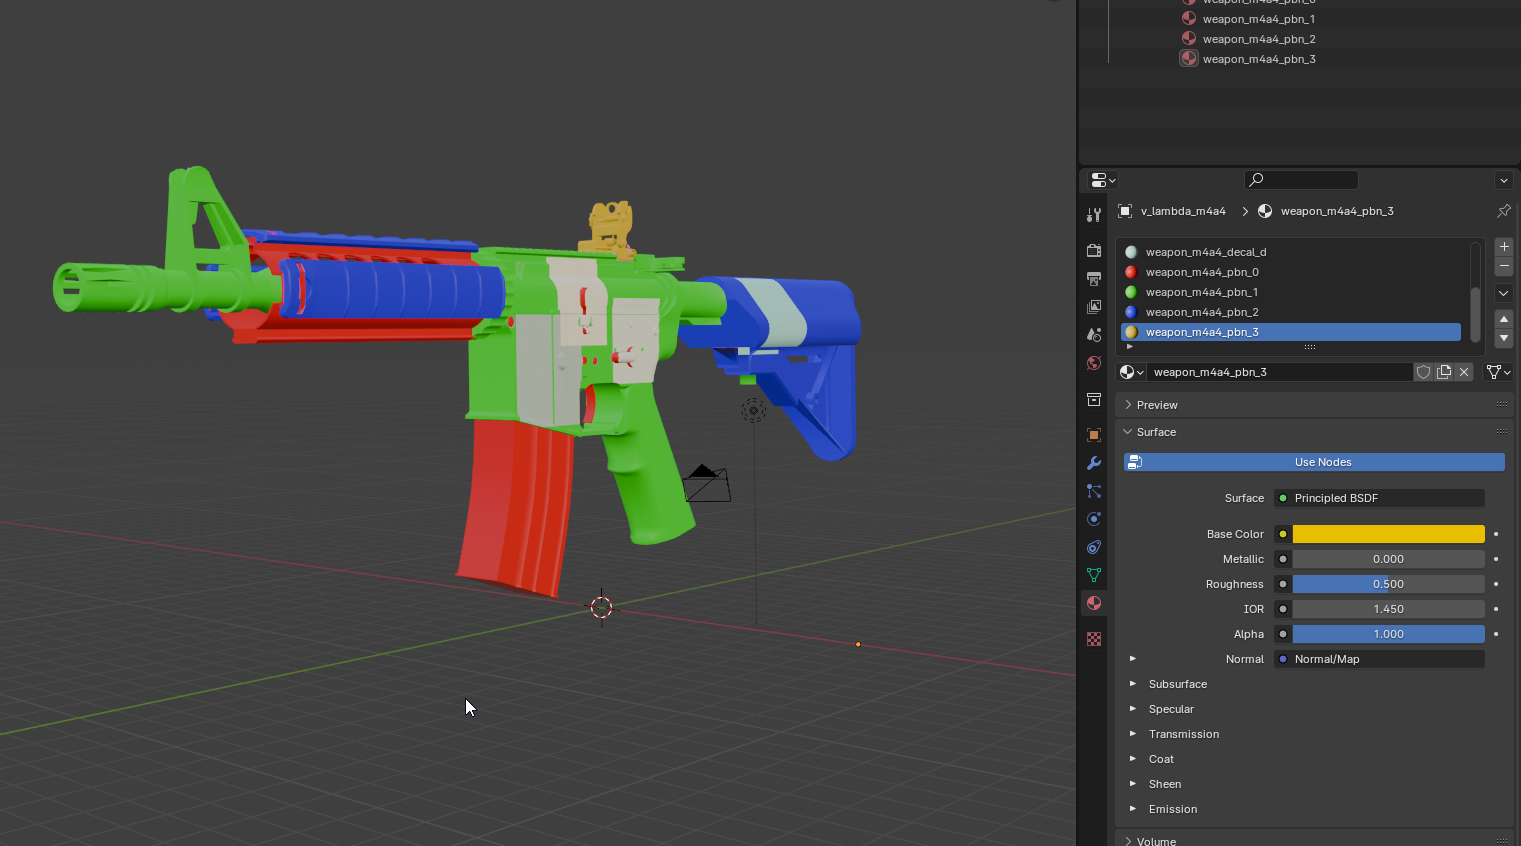
In the screenshot above, I've coloured each slot.
Changing the colours of each part of the model can help you visualise the different material slots and decide which parts you may want to keep as the default material.
There are also 4 white materials representing the stickers. You can hide these, as detailed below.
If you wish to hide the stickers, you can do this easily by modifying the material.
weapon_m4a4_decal_a)0.0Alpha Blend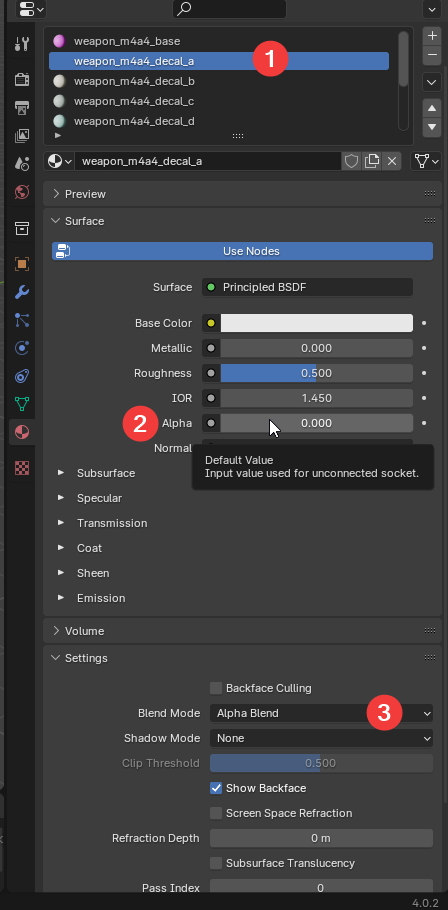
You will now notice that the stickers have been hidden from the weapon model.
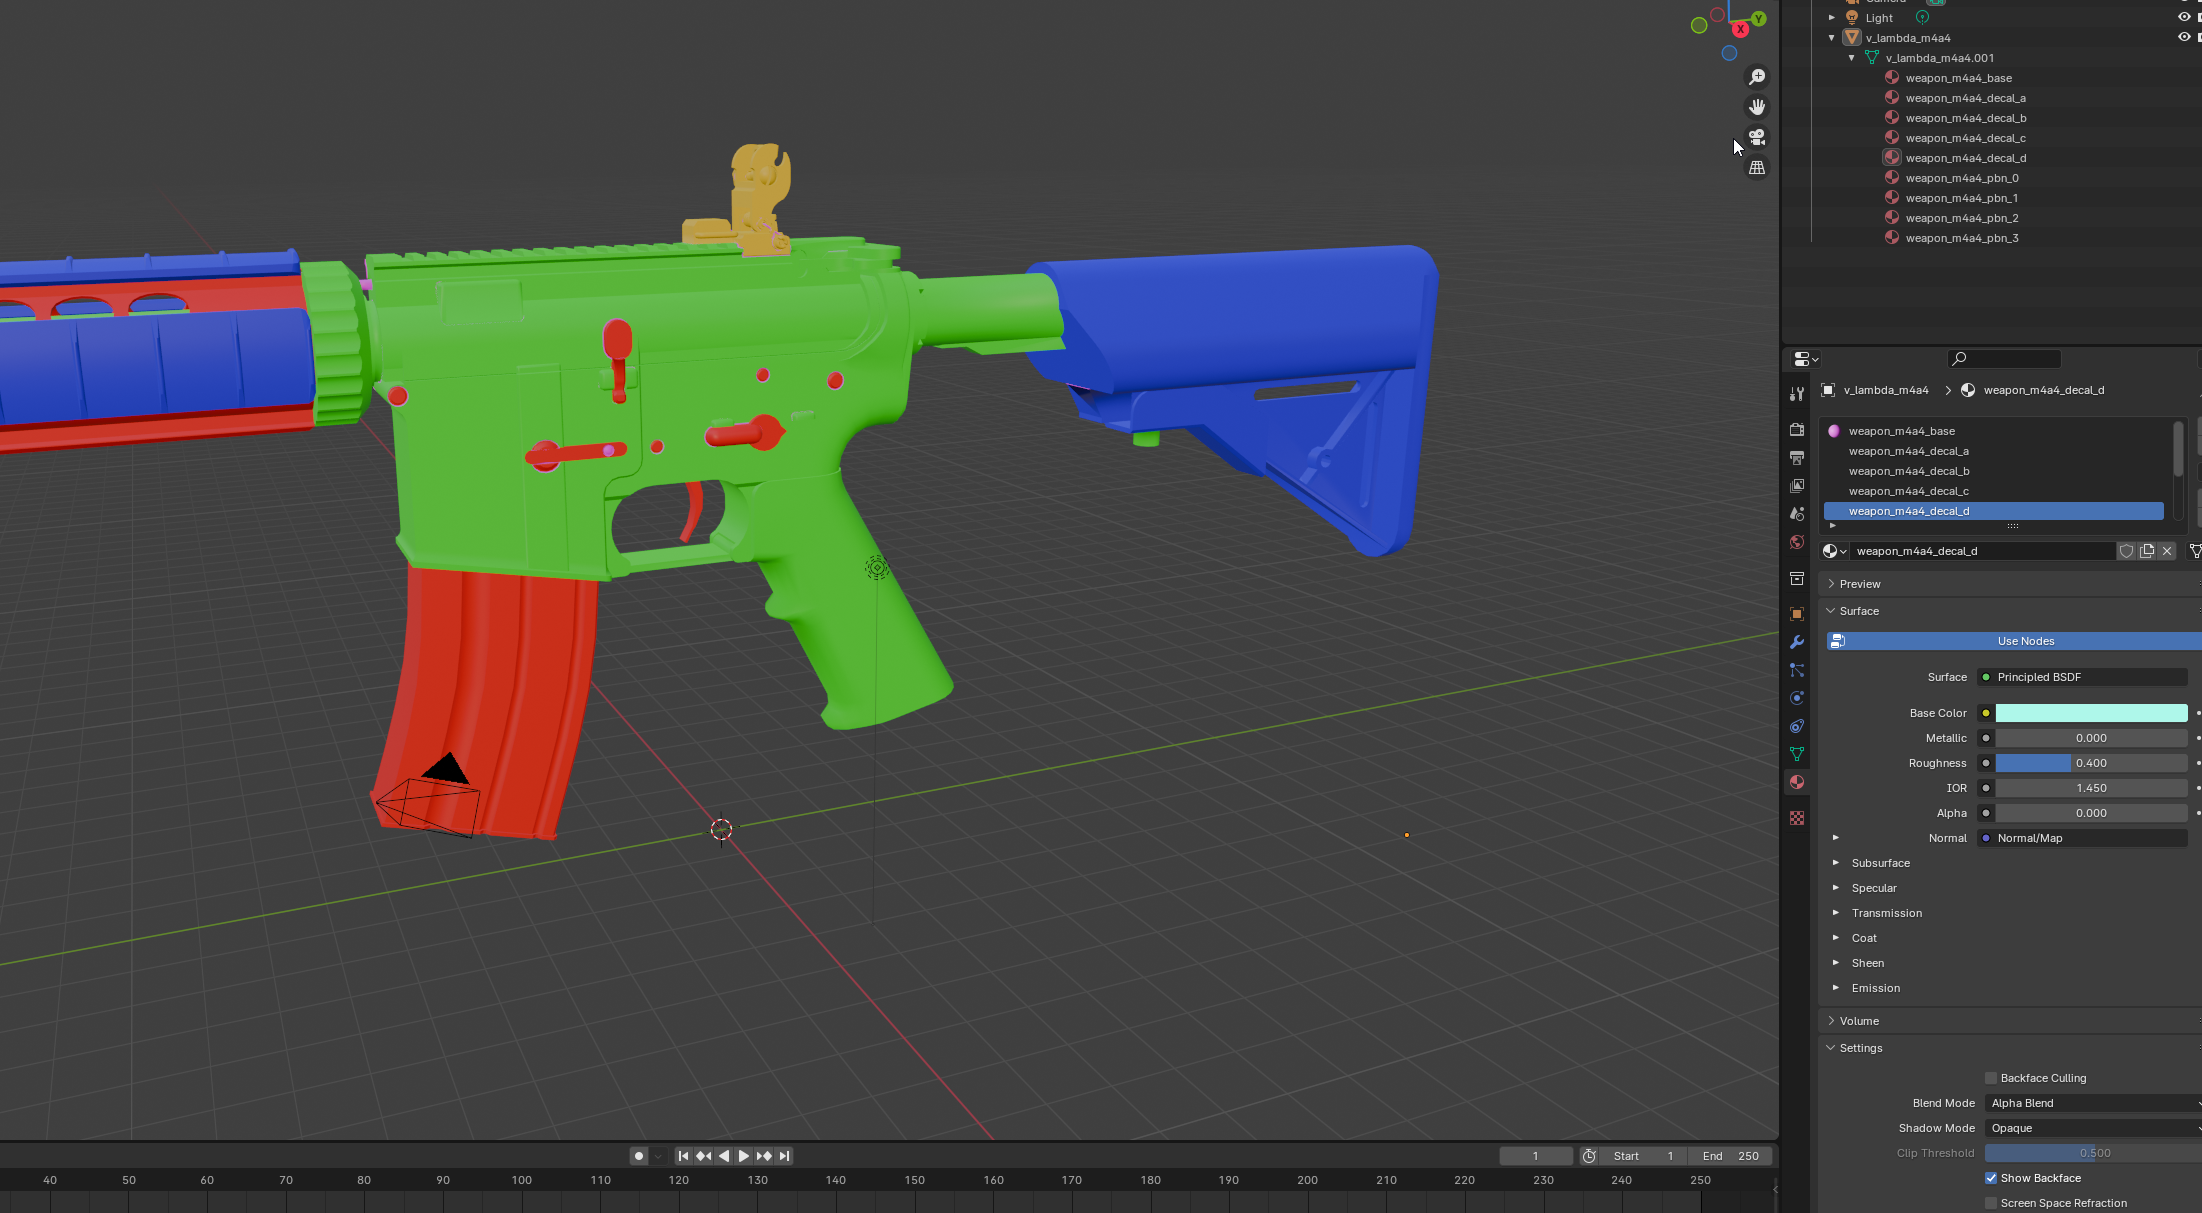
When testing patterns, select the material for the area you wish to apply the pattern to.
In this example, the M4A4 | Urban DDPAT is being used. This is a Hydrographic pattern, which paints one part of the weapon with the pattern and the rest with the colours used in the pattern.
Here, I'm using weapon_m4a4_pbn_1, highlighted in green below.
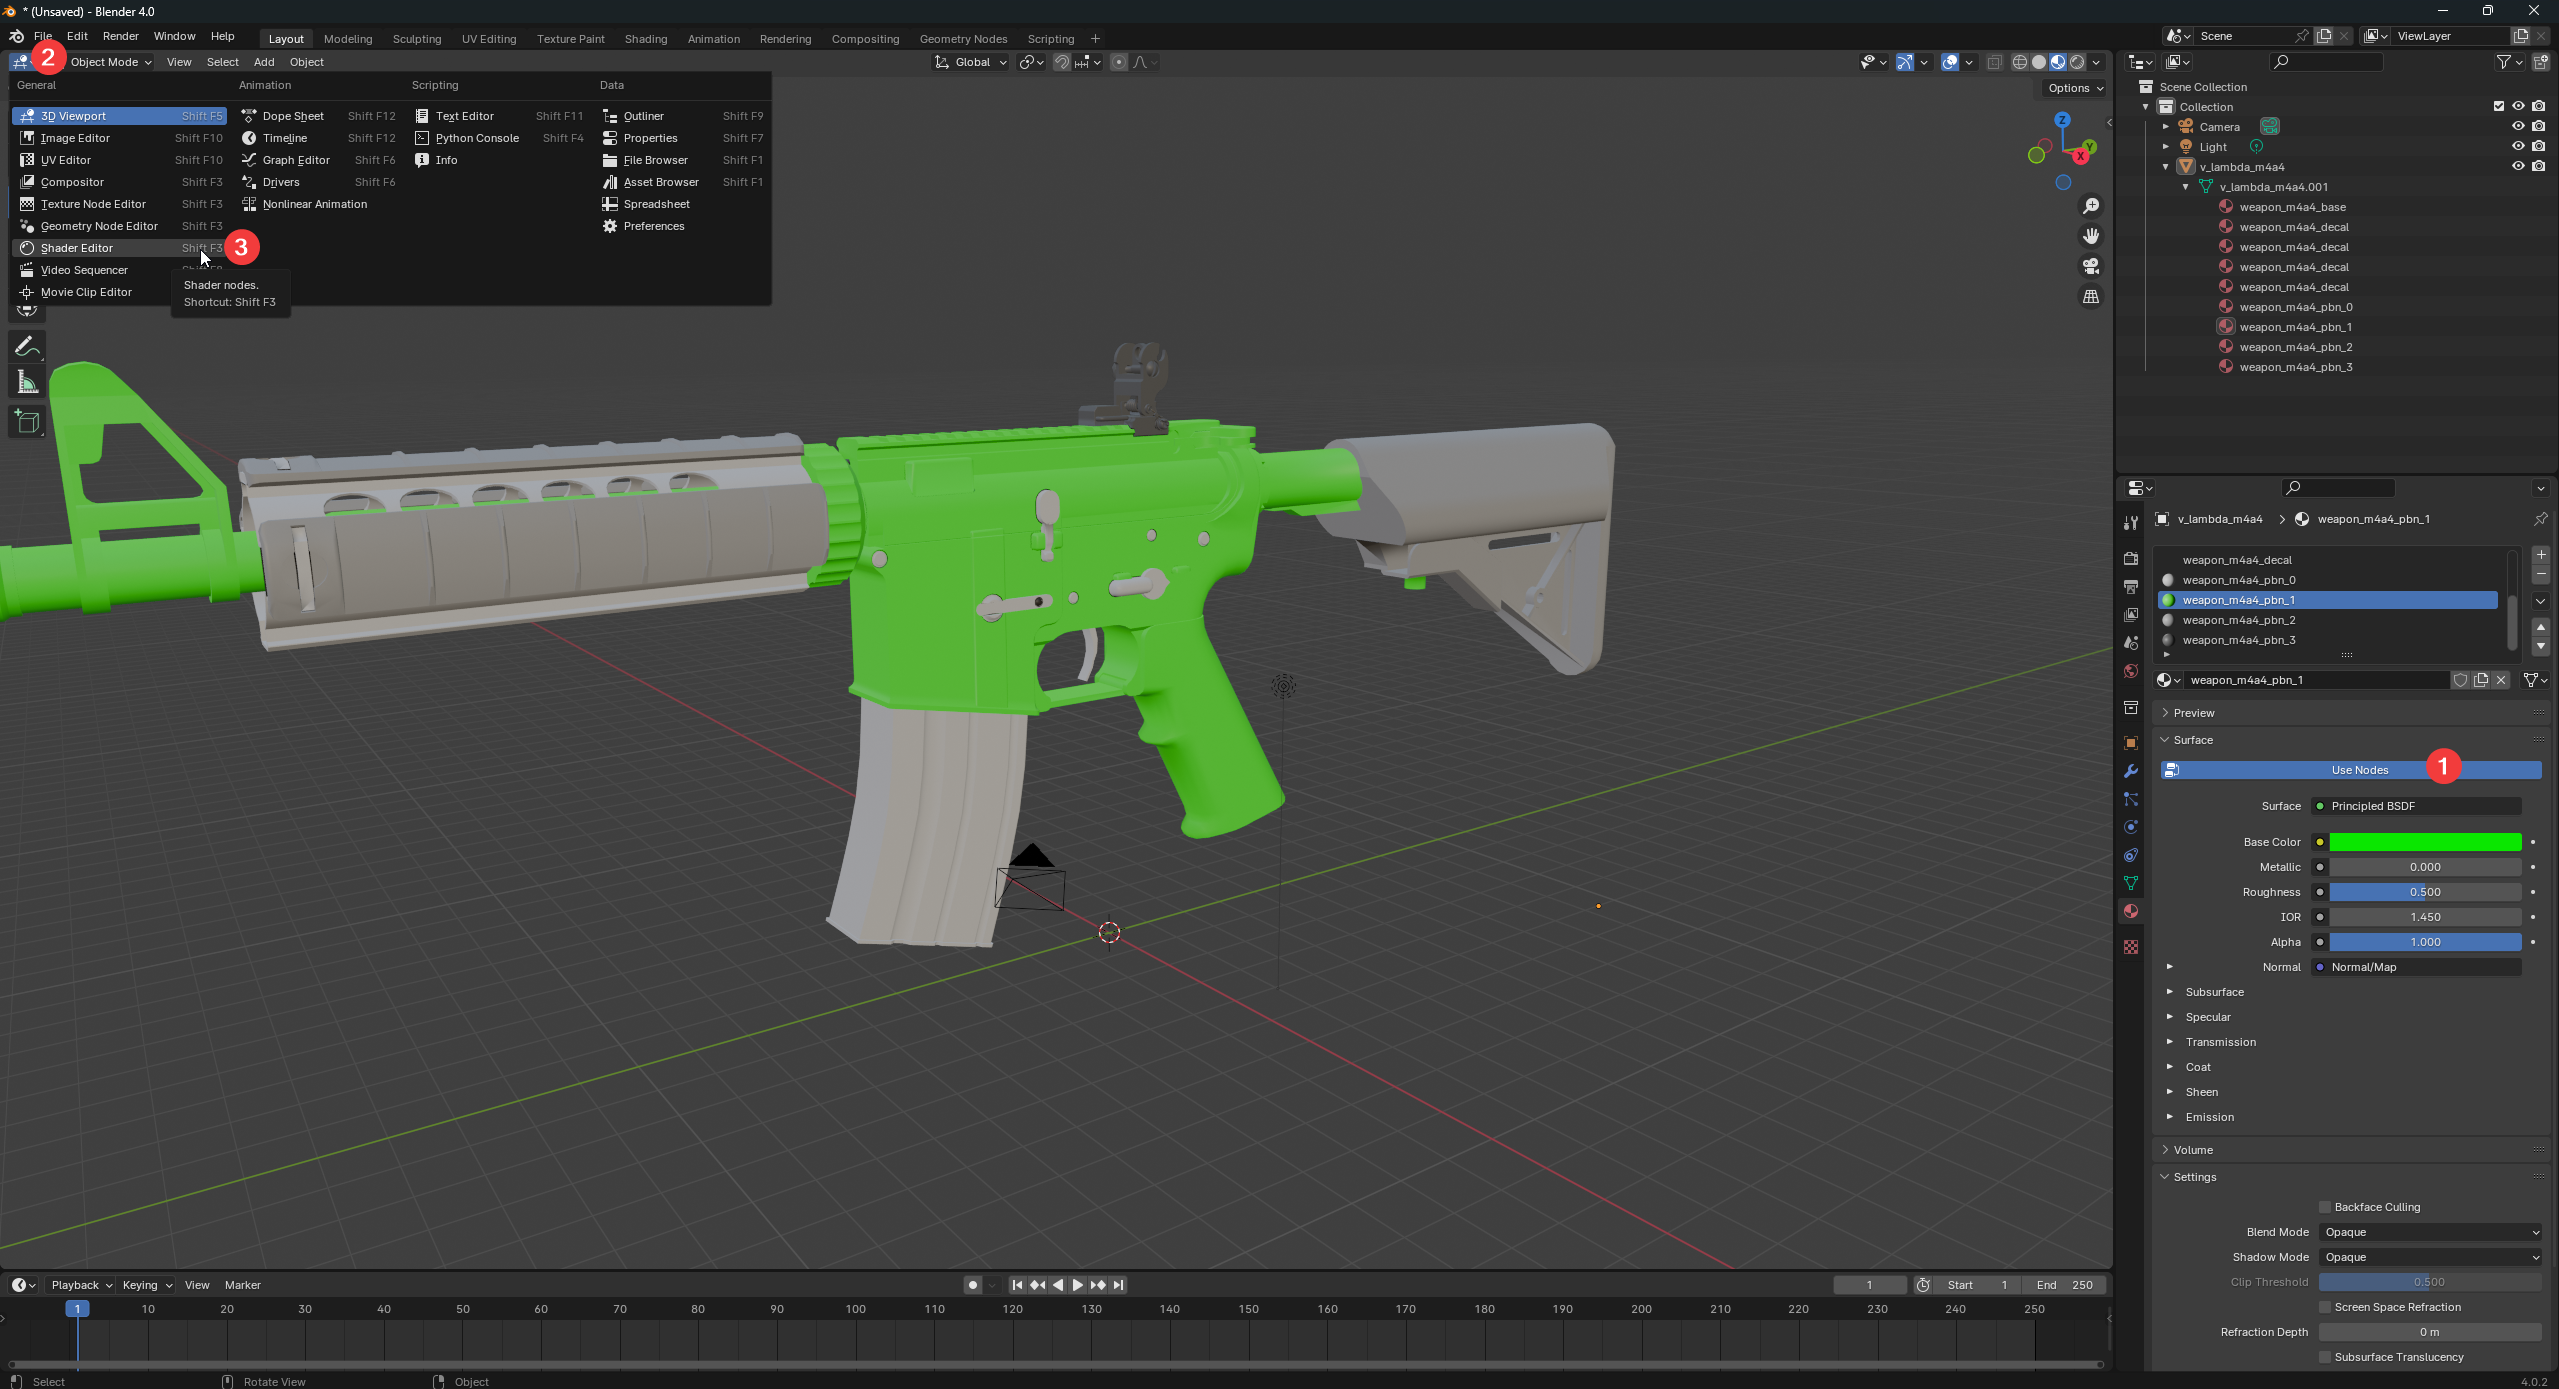
Once in the shader editor:
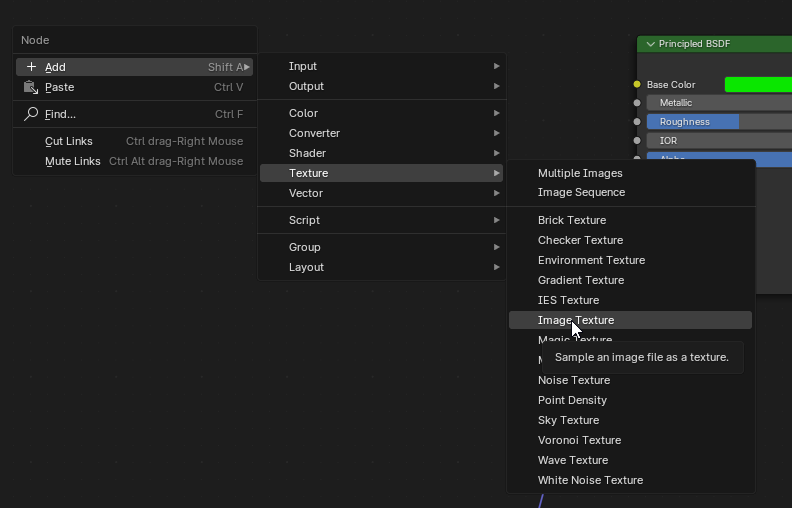
Repeat the steps above, but for the following node types:
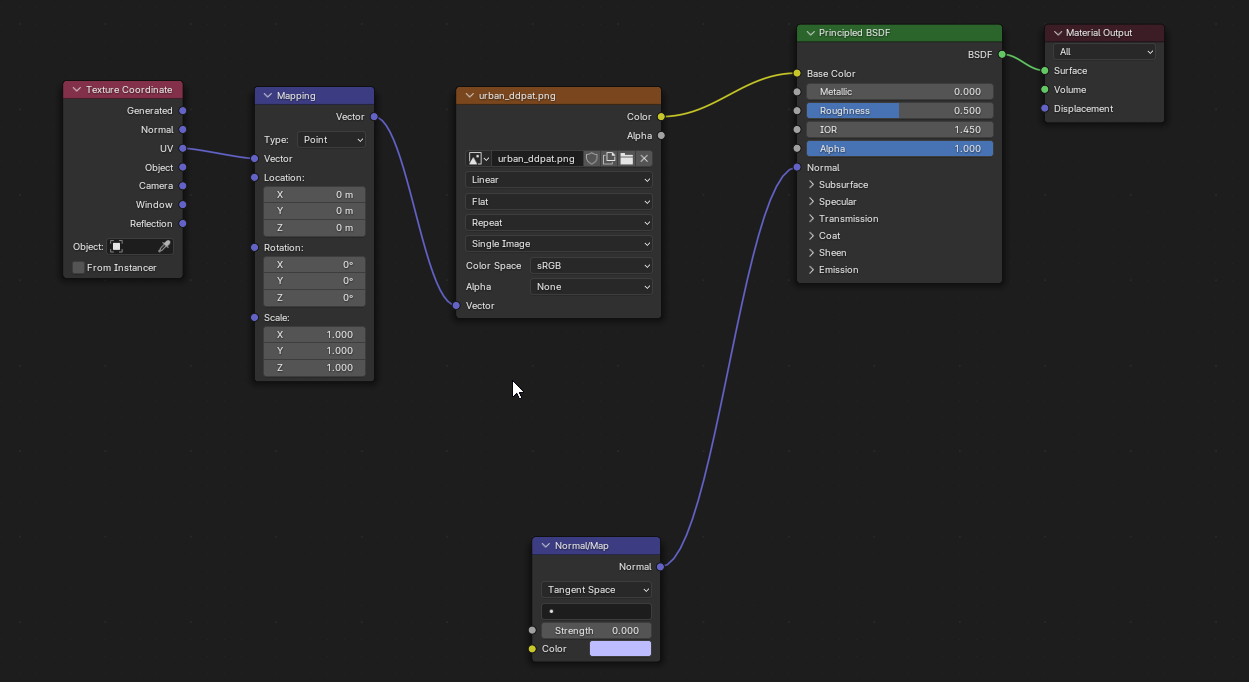
Connect the nodes as shown in the example below.
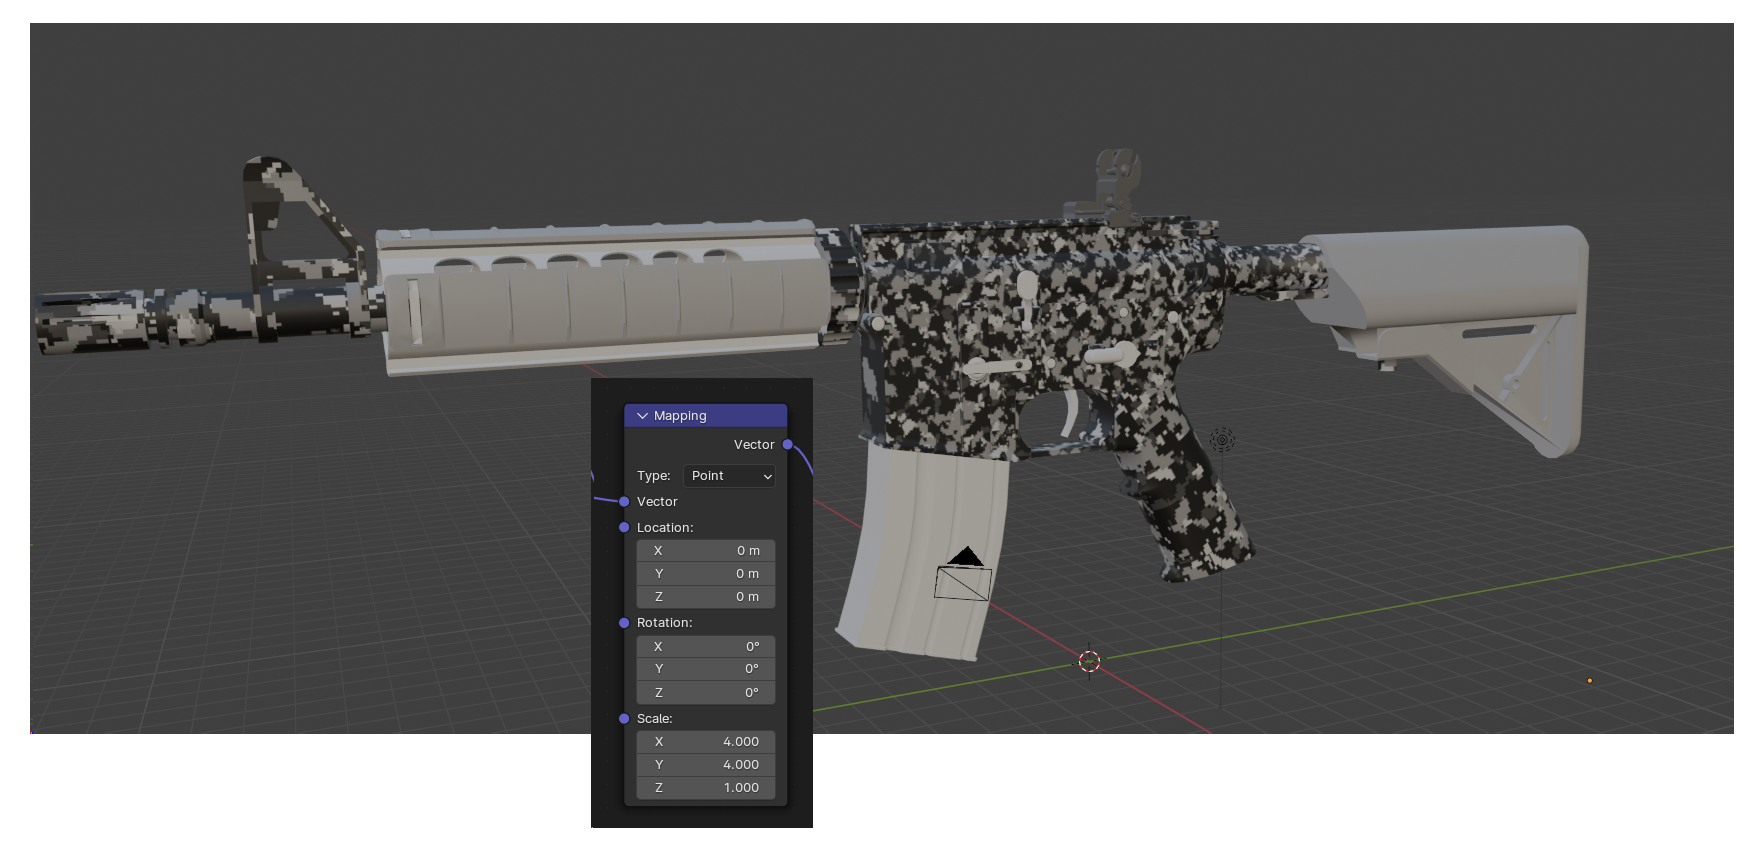
Go back to the 3D Viewport by pressing SHIFT + F5 and the weapon will now look something like this:
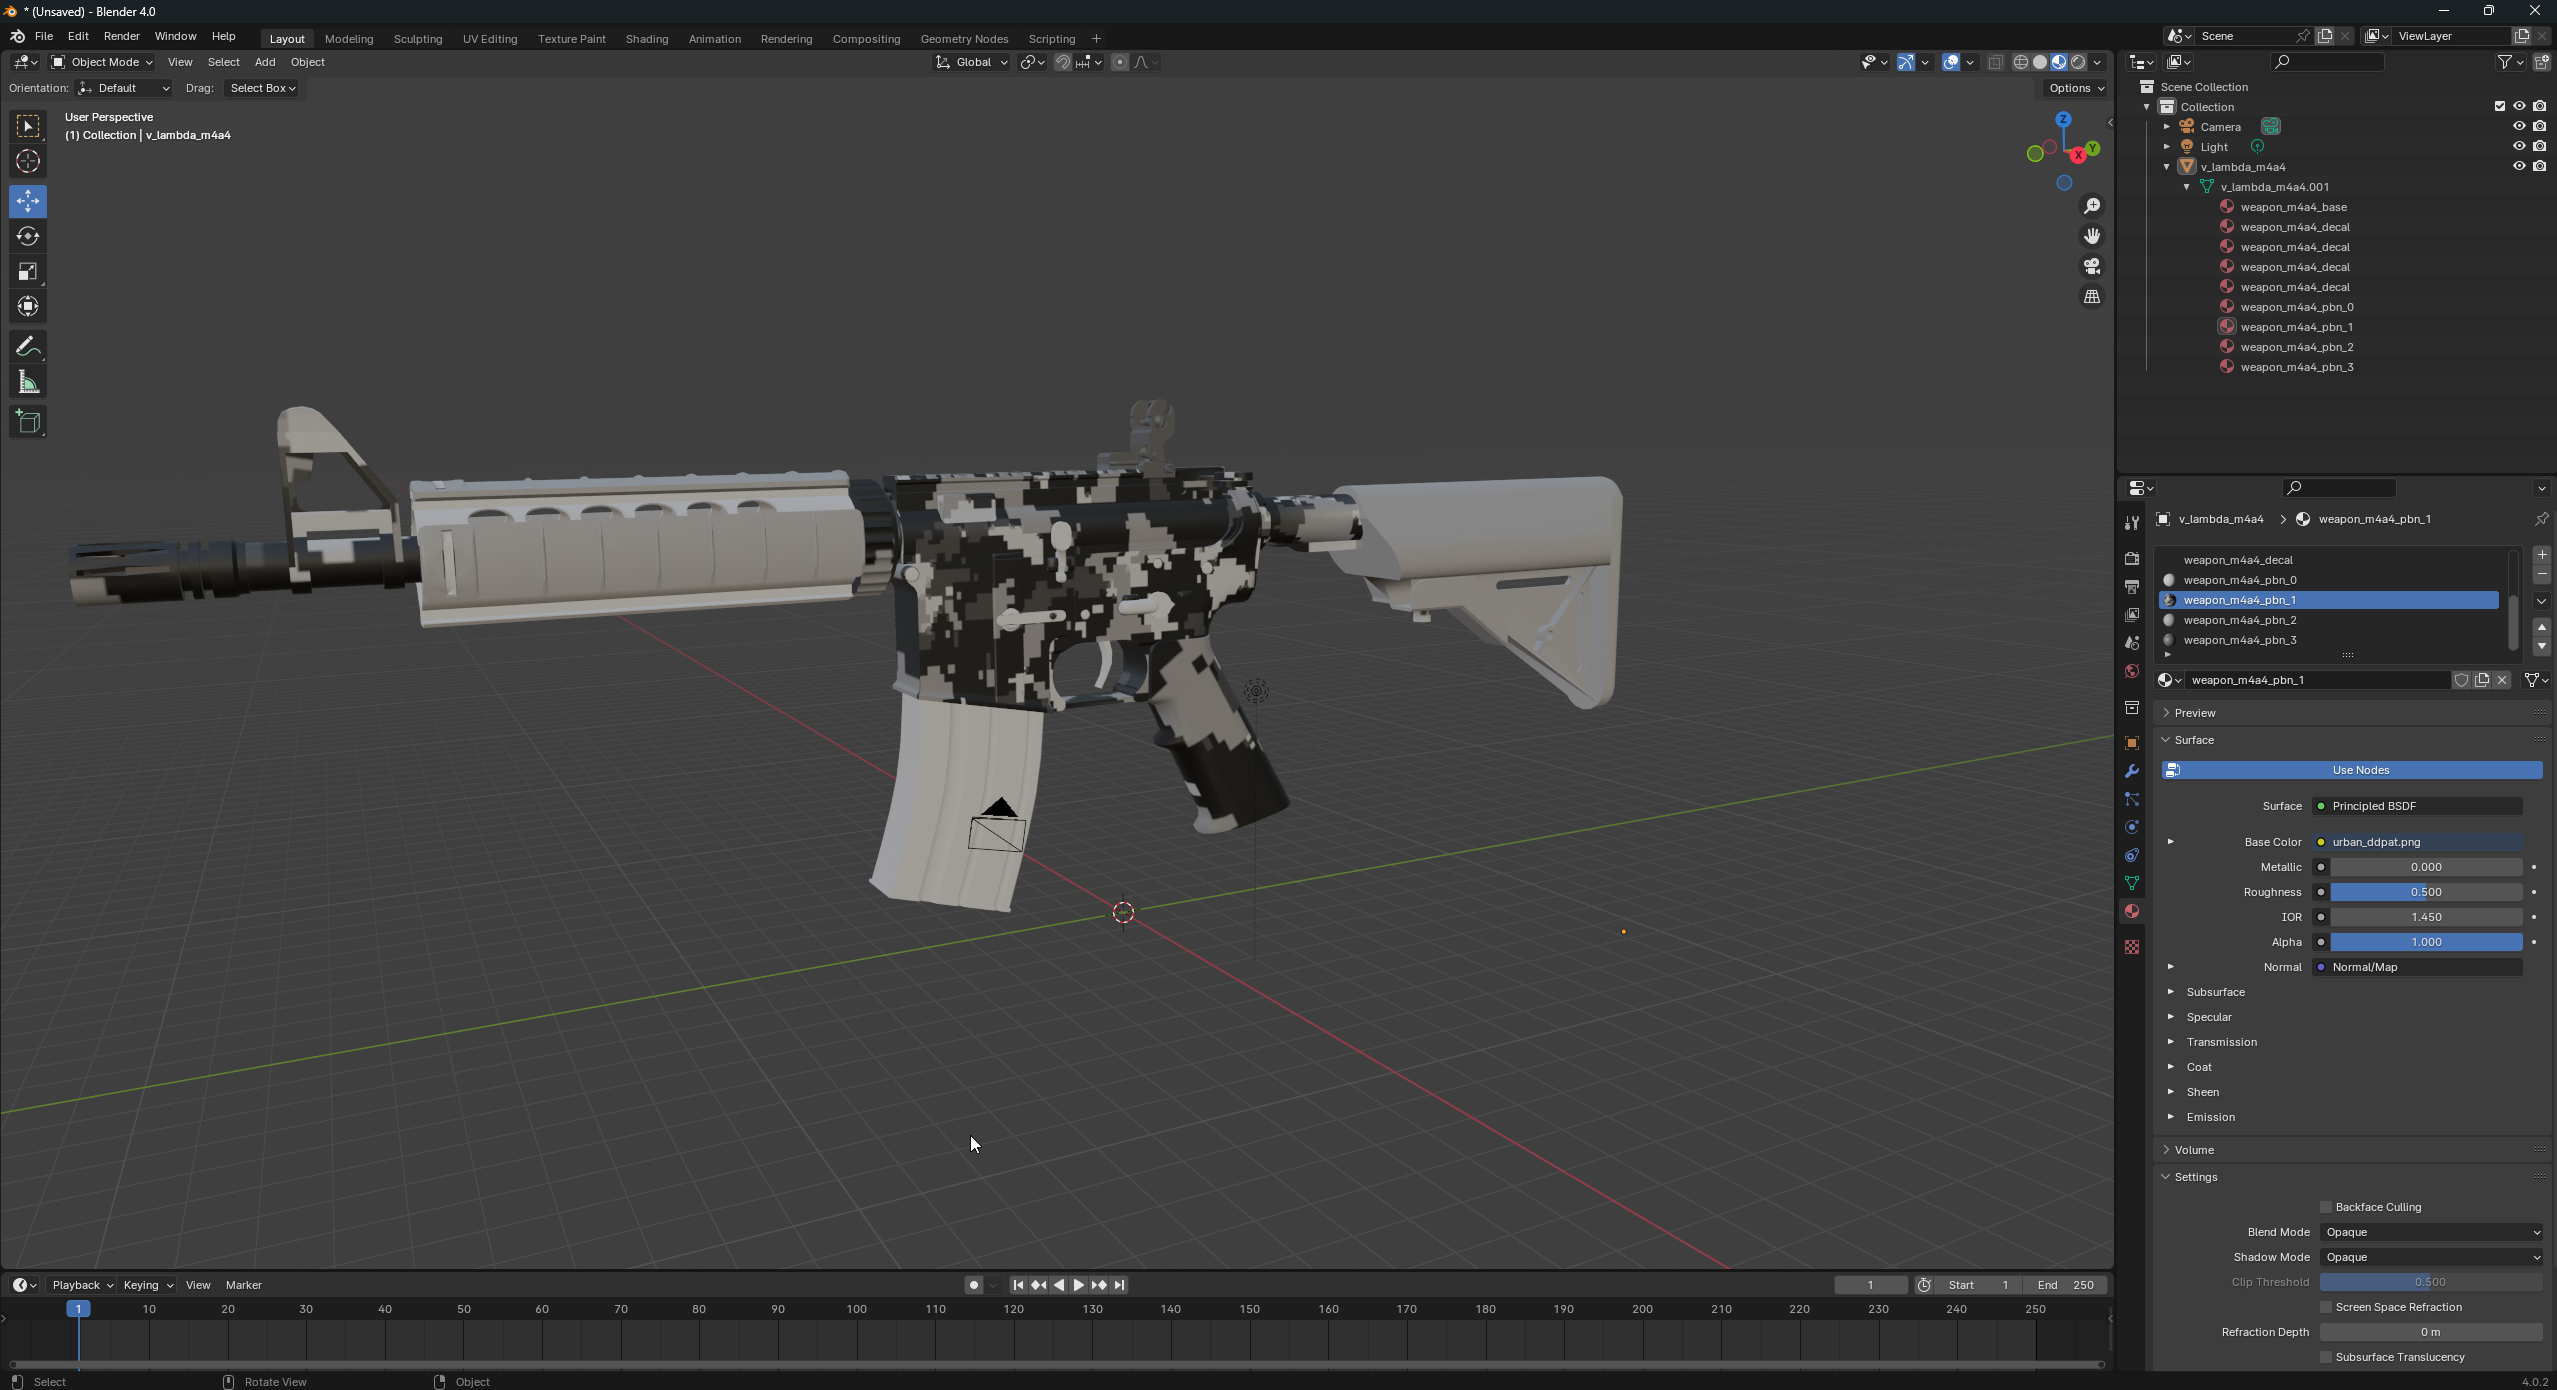
You can adjust the X, Y, Rotation and scale in the mapping node to change how your pattern scales, rotates and moves.
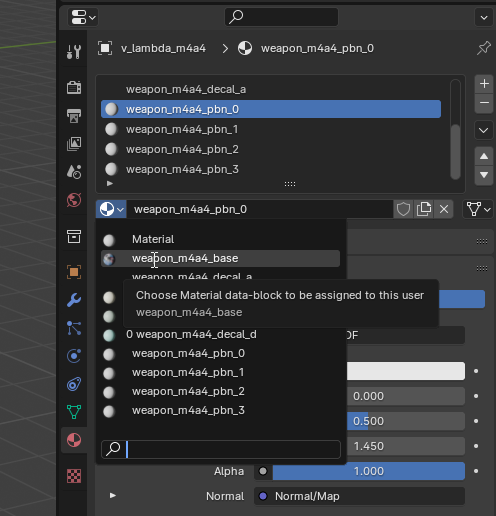
Select the material weapon_{weapon}_base to be your custom paint and set the base material and any normal maps.
Go through each of the *_pbn_* materials (e.g. weapon_m4a4_pbn_1, weapon_m4a4_pbn_2, and so on).
Re-map each one to use the base texture as shown below:
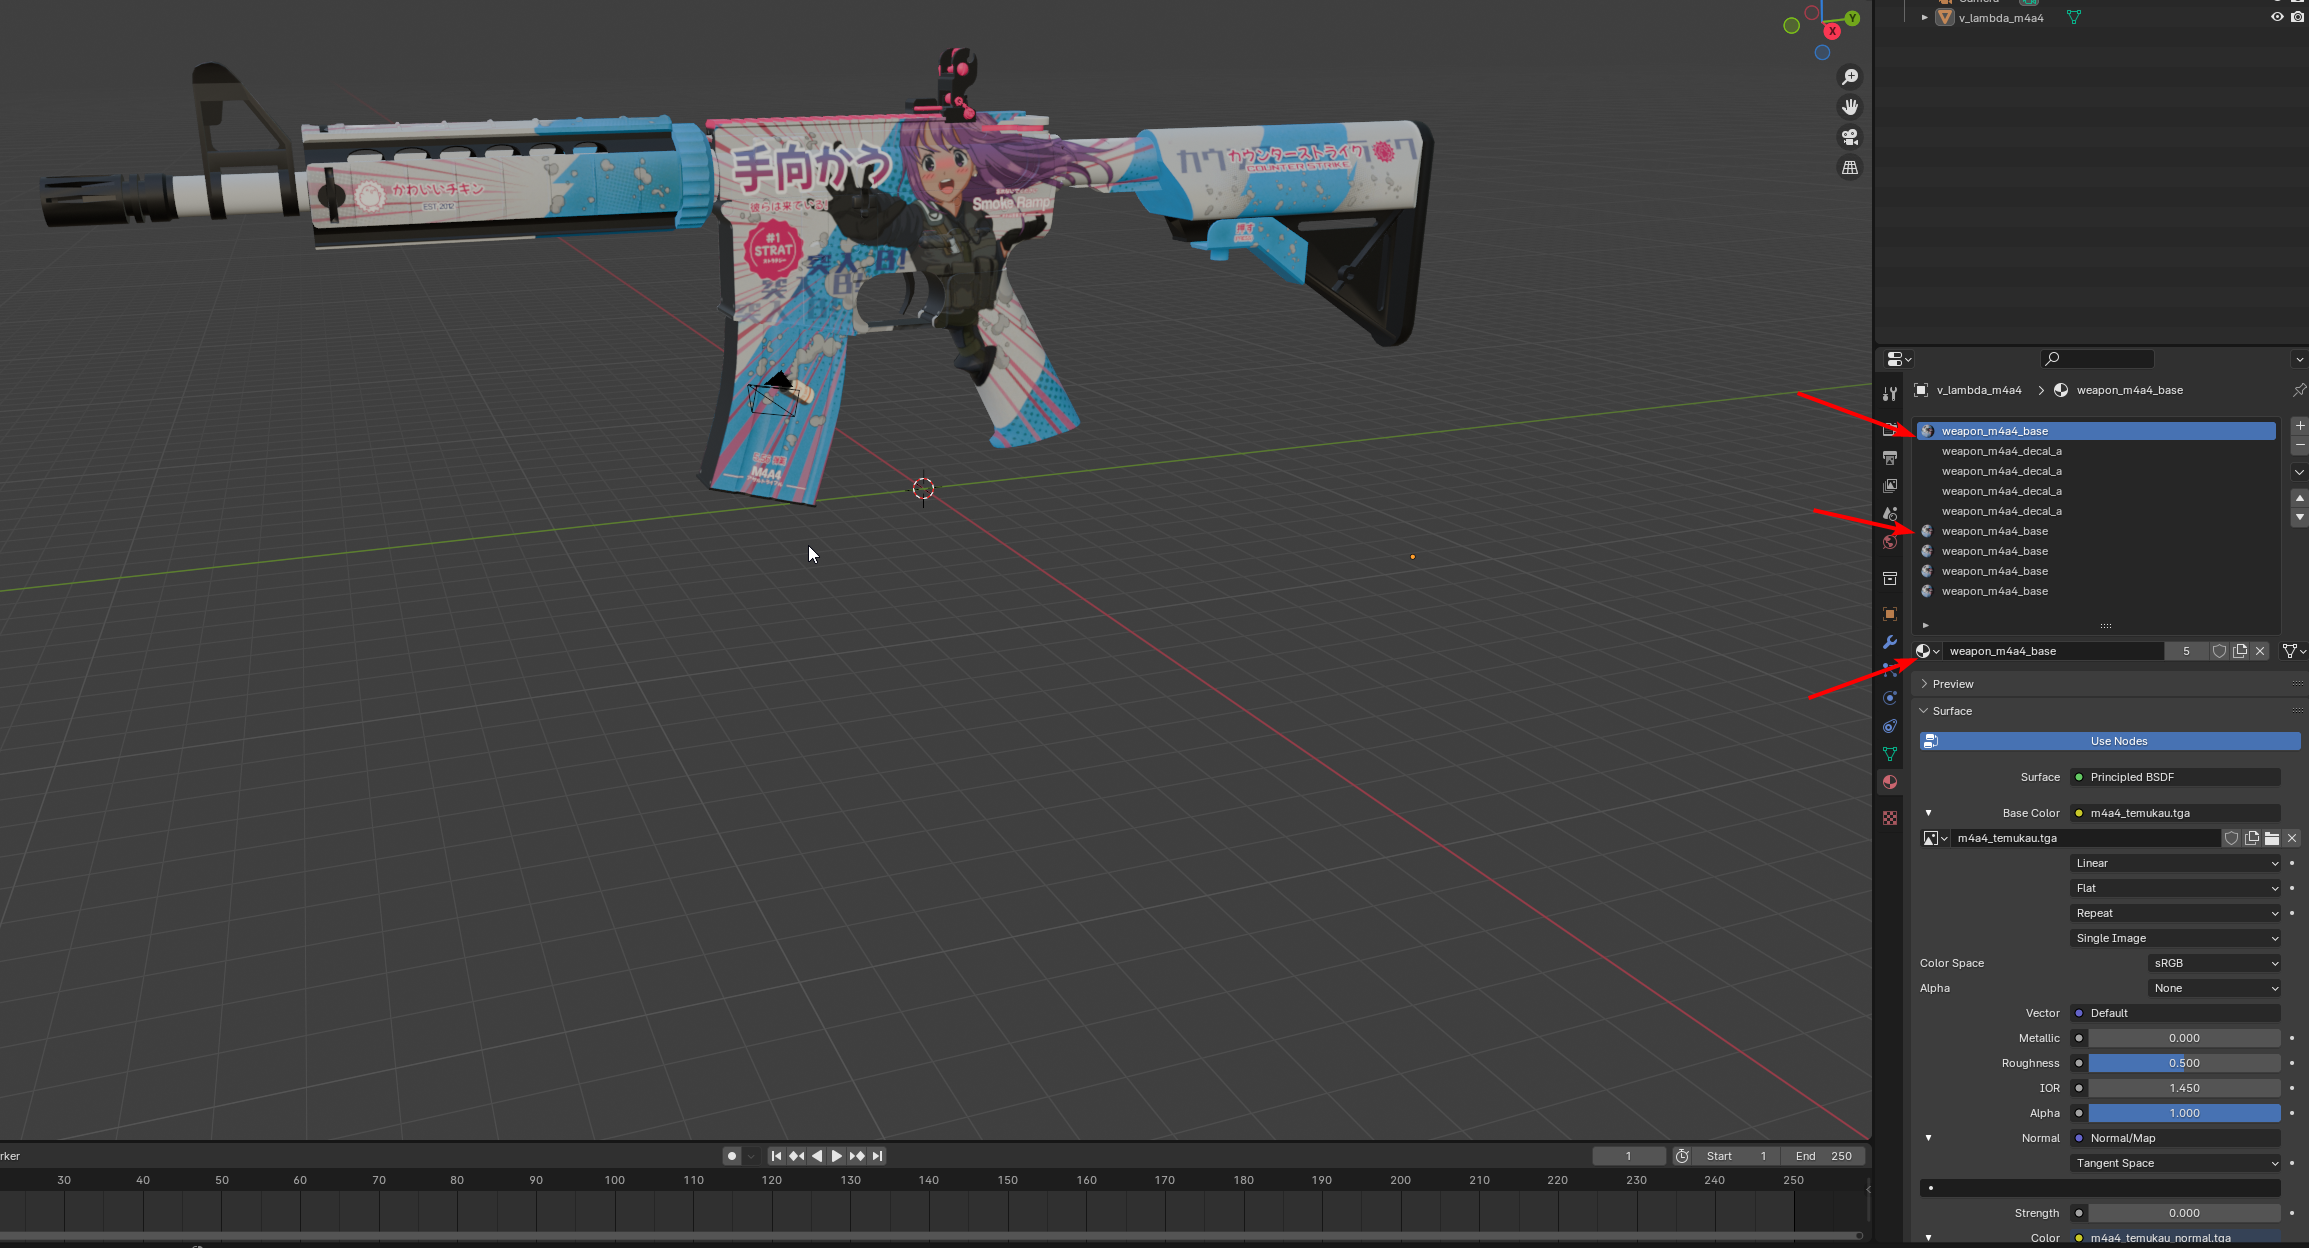
In the 3D viewport, you should now see your custom material across the whole model.


 Counter-Strike: Global Offensive
 Counter-Strike 2
 Left 4 Dead 2